Meta Description: Tired of craft supplies overflowing and projects never getting finished? Discover practical living room craft supply storage solutions that keep supplies accessible, protected, and make crafting actually enjoyable. Tested by real crafters.
Reading Time: 17 minutes | Difficulty: Beginner to Intermediate | Last Updated: April 2026
That Moment When You Cannot Find the Scissors While Your Craft Project Is Waiting
You know the feeling. You finally have time to work on your craft project. You are excited. You are ready to create. You reach for the scissors and… they are gone. You dig through three different containers. You find glue from 2022 but no scissors. The scissors are buried behind the fabric you bought once and never used. Your creative momentum is gone. Your craft time is wasted. You put the project away and scroll on your phone instead.
This is not just frustrating. This is expensive. The average household wastes $300-800 per year on duplicate craft supplies they cannot find. Another $200-500 on supplies that dry out, expire, or get damaged from improper storage. And countless creative moments lost because finding the right supply took too long.
Good craft supply storage is not about having a perfect craft room with matching containers and perfect labels. It is about knowing exactly where every supply lives so you can find it in 30 seconds or less. It is about supplies that stay fresh and usable for their full lifespan. It is about crafting being joyful instead of frustrating.
This guide shows you how to make that happen. No expensive craft room renovation required. No matching container sets necessary. Just practical, tested solutions that work for real living rooms with real crafters and real craft supply chaos.
Why Your Current Craft Supply Storage Is Wasting Money and Killing Creativity
Let us talk about what bad craft supply storage actually costs. It is more than just clutter.
The Duplicate Purchase Cost:
When you cannot find what you have, you buy more. That third pack of scissors. The second set of paint brushes. The fourth glue gun you forgot you owned. The average household spends $300-800 per year on duplicate craft supplies they already owned. This adds up fast.
The Expired Supply Cost:
Craft supplies stored improperly dry out and expire. Glue dries. Paint separates. Markers dry out. The average household wastes $200-500 per year on expired supplies that no longer work properly. That is money literally thrown away.
The Time Cost:
Fifteen minutes per craft session searching for supplies. That is 65 hours per year if you craft five times per month. What could you do with an extra 65 hours? Finish more projects. Learn new techniques. Actually enjoy your crafting without supply stress lingering.
The Creativity Cost:
This one matters most. Creative momentum is fragile. When you cannot find supplies quickly, your creative flow breaks. Projects get abandoned. Creativity gets frustrated. The mental load of managing craft chaos decreases your commitment to creative activities.
The Goal:
Your craft supply storage should accomplish three things. First, every supply is findable in 30 seconds or less. Second, supplies stay fresh and usable for their full lifespan. Third, crafting feels joyful instead of frustrating.
That is it. Nothing fancy. Just functional, sustainable organization that supports your creativity instead of sabotaging it.
The Great Craft Supply Audit: Face Your Craft Chaos
Before you buy a single container or organizer, you need to know what you are working with. Most crafters have no idea how many craft supplies they actually own.
The Weekend Craft Supply Audit:
Set aside 3-4 hours on a weekend. Empty every cabinet, drawer, and storage area where craft supplies live. Every supply. Every tool. Every container. Every miscellaneous item. Bring everything out where you can see it all. Yes, even that cabinet you have not opened since you got that gift set last Christmas. Yes, even the corner where supplies go to disappear.
Lay everything out where you can see it all. This moment is eye-opening. Most crafters discover they own 3-5 of common items. Multiple packs of scissors. Four glue guns when one would suffice. Specialty supplies from craft phases they have moved through.
Sort Into Four Piles:
Keep: Supplies in good condition that you actually use. Not the specialty supplies you think you should use. The supplies you actually reach for when crafting.
Replace: Supplies that are dried out, expired, or compromised. Old glue. Dried markers. Separated paint. If it is essential and compromised, replace it.
Donate: Good condition but you do not use them. Extra supplies from gifts. Complete sets you will never use. Specialty supplies from craft phases you have moved through.
Toss: Supplies with permanent damage. Expired supplies. Anything with contamination or dried out beyond use. Single supplies from sets where others are missing.
What You Will Discover:
Most crafters find they have supplies from craft phases they completed years ago. That specialty fabric from the one time you tried quilting in 2023. The specialty supplies from craft phases you have moved through. The duplicate supplies from gifts you received but never needed.
This is normal. This is also fixable.
Keep what you actually use. Replace what is dried out. Donate what you do not need. Toss what is expired. This alone frees up 40-60% of your craft supply storage space.
Craft Supply Quantity Guidelines:
| Craft Type | Essential Supplies | Specialty Supplies | Total Items |
|---|---|---|---|
| Paper Crafts | 15-25 items | 10-20 items | 25-45 items |
| Sewing | 20-30 items | 15-25 items | 35-55 items |
| Painting | 15-25 items | 20-30 items | 35-55 items |
| General Crafting | 25-40 items | 20-35 items | 45-75 items |
| Multi-Craft | 40-60 items | 40-80 items | 80-140 items |
Supply Expiration Guidelines:
| Supply Type | Shelf Life (Unopened) | Shelf Life (Opened) | Storage Location |
|---|---|---|---|
| Glue sticks | 2-3 years | 1-2 years | Cool, dry place |
| Liquid glue | 1-2 years | 6-12 months | Cool, dry place |
| Markers | 2-3 years | 1-2 years | Cool, dry place, capped |
| Paint | 2-5 years | 1-3 years | Cool, dry place |
| Fabric | 5-10 years | 5-10 years | Cool, dry, dark place |
| Paper | 5-10 years | 5-10 years | Cool, dry, dark place |
| Adhesive tape | 2-3 years | 1-2 years | Cool, dry place |
The Hard Questions:
“But It Was Expensive”:
That $80 specialty fabric is not worth $80 if it sits unused. It is worth $0. Donate it to someone who will use it. That honors the investment better than letting it collect dust.
“But I Might Use It Someday”:
Someday rarely comes. If you have not used it in 12 months, you will not use it in the next 12 months either. Trust the pattern.
“But It Was a Gift”:
The gift served its purpose when you received it. You do not honor the giver by keeping supplies you will never use. You honor them by using gifts or passing them to someone who will.
Sort Supplies by Craft Type: Create Your Craft Library
Your craft supplies have more specific organization needs than you think. The key is grouping by craft type. Proper craft type organization transforms chaotic supplies into functional storage.
Why Craft Type Organization Works:
Craft type organization creates designated spots for each supply type. No more searching through unrelated supplies. No more digging through piles. Everything is accessible without moving other supplies. Your craft area becomes functional instead of frustrating.
Craft Type Categories:
Paper Crafts:
- Cardstock, patterned paper
- Scissors, paper trimmers
- Adhesives (glue sticks, liquid glue, tape)
- Stamps, dies, embossing tools
- Embellishments (stickers, ribbons, etc.)
Sewing and Fabric:
- Fabric (sorted by type/color)
- Thread (sorted by color)
- Needles, pins, pin cushions
- Scissors, rotary cutters
- Patterns, measuring tools
Painting:
- Paints (sorted by type/color)
- Brushes (sorted by size/type)
- Palettes, water cups
- Canvas, paper, surfaces
- Easels, drying racks
General Crafting:
- Glue guns, glue sticks
- General adhesives
- Basic tools (scissors, rulers)
- Embellishments, findings
- Storage containers
Organization System Options:
By Craft Type:
- Best for: Multi-craft households, various projects
- Price: $0 (existing system)
- Best feature: Supplies grouped by project type
- Considerations: Requires knowing craft types
By Supply Type:
- Best for: Single-craft focus, tool-heavy crafting
- Price: $0 (existing system)
- Best feature: All tools together, all adhesives together
- Considerations: Less intuitive for project setup
By Frequency:
- Best for: Active crafters, project-focused
- Price: $0 (existing system)
- Best feature: Most-used supplies most accessible
- Considerations: Requires tracking usage
By Project:
- Best for: One project at a time crafters
- Price: $0 (existing system)
- Best feature: Everything for current project together
- Considerations: Less efficient for multiple projects
Organization Best Practices:
Group Like Items:
All scissors together. All adhesives together. All paints together. This makes finding supplies effortless.
Store by Frequency:
Daily-use supplies most accessible. Weekly-use supplies moderately accessible. Monthly-use supplies less accessible. This matches storage to actual usage.
Protect Sharp Tools:
Scissors, blades, needles need protected storage. Use protected cases or designated compartments. Never store loose in drawers.
Leave Some Flexibility:
Do not fill every container completely. Leave some flexible space for new supplies or project changes. Your collection will change over time.
Organization Quantity Guidelines:
| Craft Collection Size | Recommended Containers | Supply Capacity |
|---|---|---|
| Small (under 50 items) | 10-20 containers | 50-100 items |
| Medium (50-150 items) | 20-40 containers | 100-300 items |
| Large (150-300 items) | 40-60 containers | 300-600 items |
| Extra Large (300+ items) | 60+ containers | 600+ items |
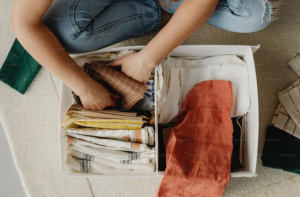
Use Clear Storage Containers: Visibility Meets Protection
Not all craft supply containers are created equal. The right containers keep supplies fresh longer, stack efficiently in your living room, and actually get used instead of sitting in the back of cabinets.
Container Type Comparison:
Clear Plastic Containers:
- Best for: Supply visibility, stacking, affordability
- Price: $20-80 per set
- Best feature: See contents without opening, stackable
- Considerations: Can absorb odors over time
Clear Glass Containers:
- Best for: Supply freshness, no odor absorption
- Price: $40-150 per set
- Best feature: Does not absorb odors, easy to clean
- Considerations: Heavier, can break if dropped
Clear Fabric Bins:
- Best for: Soft appearance, flexible storage
- Price: $15-60 per set
- Best feature: Collapsible, soft edges, visible mesh
- Considerations: Less structure, can sag when full
Stackable Drawer Units:
- Best for: Small supplies, organized compartments
- Price: $30-100 per unit
- Best feature: Multiple compartments, stackable
- Considerations: Fixed compartment sizes
Container Size Guidelines:
| Container Size | Best For | Quantity Recommended |
|---|---|---|
| Small (2-4 cups) | Beads, buttons, small findings | 10-20 containers |
| Medium (4-8 cups) | Markers, brushes, tools | 15-30 containers |
| Large (8-16 cups) | Paper, fabric, paint bottles | 10-20 containers |
| Extra Large (16+ cups) | Bulk supplies, project boxes | 5-10 containers |
Container Features That Matter:
Airtight Seals:
Containers with airtight seals keep supplies fresh 2-3 times longer. Look for containers with silicone gaskets or locking lids. This prevents supplies from drying out.
Stackable Design:
Stackable containers utilize vertical space efficiently. Uniform sizes stack neatly. This maximizes storage in minimal living room footprint.
Clear Containers:
You can see exactly what you have without opening anything. No more “what is in this?” mystery. No more buying supplies when you already have them. You can see when supplies are running low.
Divided Compartments:
Containers with divided compartments keep small supplies organized. Beads, buttons, findings stay separated. This saves time and reduces waste.
Container Quantity Guidelines:
| Crafting Frequency | Container Sets Needed | Investment Range |
|---|---|---|
| Occasional (1-2x/month) | 15-25 containers | $50-150 |
| Regular (3-4x/month) | 25-40 containers | $100-300 |
| Frequent (5-8x/month) | 40-60 containers | $200-500 |
| Daily crafter | 60-100 containers | $300-800 |
Label Everything Clearly: End the Supply Guessing Game
Here is the truth. Most craft supply organization systems fail not because they are bad systems, but because supplies are not labeled properly. Labels fix this.
Why Labeling Works:
Labels remove decision fatigue. You do not think about what is in each container. The label tells you. Family members do not guess what is in containers. The label tells them.
Labels create accountability. When supplies are labeled with dates, you use them before they expire. When supplies are unlabeled, they become mystery containers that get pushed to the back.
Labels save money. The average household saves $200-400 per year on reduced duplicate purchases with proper labeling. That is significant savings.
Labeling Methods That Work:
Label Maker:
- Best for: Professional, durable labels
- Price: $30-60 for label maker
- Best feature: Weather-resistant, consistent appearance
- Pro tip: Use for container tops and sides
Chalkboard Labels:
- Best for: Frequently changing contents
- Price: $10-20 for pack
- Best feature: Erasable, update as needed
- Pro tip: Use for supplies you replenish frequently
Masking Tape and Marker:
- Best for: Budget-conscious labeling
- Price: $5-10 total
- Best feature: Inexpensive, works well
- Pro tip: Replace labels every 1-2 years as they wear
Pre-Printed Craft Labels:
- Best for: Quick labeling, craft-specific
- Price: $15-40 for pack
- Best feature: Fast application, craft terms included
- Pro tip: Keep near craft area for easy access
What to Label:
Container Contents:
Label what is in each container. “Scissors.” “Glue Sticks.” “Fabric Scraps.” This prevents mystery containers.
Purchase Date:
Label when supplies were purchased. “Purchased: 4/4/26.” This helps you track freshness.
Expiration Date:
Label when supplies should be used by. “Use By: 4/4/28.” This prevents using expired supplies.
Craft Type:
Label which craft type supplies are for. “Paper Crafts.” “Sewing.” “Painting.” This helps with project setup.
Labeling Best Practices:
Label Immediately:
Label containers immediately after filling. Do not wait. You will forget what is in each container.
Label Multiple Sides:
Label container tops AND sides. Tops visible when containers are stacked. Sides visible when containers are on shelves. This makes identification effortless.
Use Consistent Format:
Use the same labeling format for all containers. Contents on top. Purchase date on side. Expiration date on bottom. Consistency makes labels easy to read.
Make Labels Durable:
Use weather-resistant labels. Craft areas can get handled frequently. Labels should last for years without replacement.
Labeling Quantity Guidelines:
| Craft Collection Size | Labels Needed | Recommended Method |
|---|---|---|
| Under 50 items | 50-100 labels | Pre-printed or label maker |
| 50-150 items | 100-200 labels | Label maker with dates |
| 150-300 items | 200-400 labels | Label maker for efficiency |
| 300+ items | 400+ labels | Label maker + color coding |
Create Portable Craft Caddies: Project Mobility Meets Organization
Not all craft supplies need to stay in one place. Portable caddies keep active project supplies together and mobile. Perfect for crafters who work in multiple locations.
Why Craft Caddies Work:
Craft caddies keep project supplies together. No more searching for supplies across multiple containers. No more forgetting essential supplies. Everything you need for your project is in one place. Your crafting becomes more efficient.
Caddy Options:
Rolling Craft Carts:
- Best for: Large projects, multiple supplies
- Price: $80-250
- Best feature: Mobile, high capacity, multiple levels
- Considerations: Takes floor space, requires assembly
Tote Bags:
- Best for: Portability, soft storage
- Price: $30-100
- Best feature: Lightweight, collapsible, handles
- Considerations: Less structure, supplies can shift
Hard-Shell Cases:
- Best for: Protection, organized compartments
- Price: $50-200
- Best feature: Protected supplies, organized compartments
- Considerations: Heavier, less flexible
Tiered Caddies:
- Best for: Small supplies, visibility
- Price: $40-150
- Best feature: Multiple levels, supplies visible
- Considerations: Less portable, stationary use
Caddy Best Practices:
Project-Based Organization:
Organize caddies by project. All supplies for current project in one caddy. This prevents supply searching during projects.
Supply Protection:
Use small containers inside caddies. This prevents small supplies from shifting and getting lost. Keeps supplies organized within caddy.
Easy Transport:
Choose caddies with handles or wheels. This makes moving projects easy. Reduces strain when transporting supplies.
Caddy Quantity Guidelines:
| Project Type | Recommended Caddies | Supply Capacity |
|---|---|---|
| Single project | 1 caddy | 20-40 items |
| Multiple projects | 2-3 caddies | 40-120 items |
| Family crafting | 3-5 caddies | 60-200 items |
| Teaching/classes | 5+ caddies | 100+ items |
Establish Craft Zones: Location Is Everything
Your craft zone location determines whether you actually craft. Proper zone organization makes crafting effortless.
The Craft Zone Rules:
Your craft zone should meet ALL three criteria:
Accessible Location:
Craft zone should be easy to access. Not in the garage requiring setup every time. Not on the dining table requiring clearing. Easy to access means more crafting.
Protected Surface:
Craft zone should have protected surfaces. Craft mats. Drop cloths. Protected tables. This prevents damage to furniture from craft activities.
Supply Proximity:
Craft zone should be near supply storage. Supplies within arm’s reach. This prevents getting up during projects and losing momentum.
Craft Zone Location Options:
Dedicated Craft Table:
- Best for: Frequent crafters, dedicated space
- Price: $150-500 for table
- Best feature: Permanent craft space, protected surface
- Considerations: Takes living room space
Convertible Furniture:
- Best for: Multi-purpose living rooms
- Price: $200-800 for furniture
- Best feature: Craft space when needed, hidden when not
- Considerations: Requires setup each time
Corner Station:
- Best for: Small living rooms, minimal space
- Price: $100-400 for setup
- Best feature: Utilizes corner space, compact
- Considerations: Limited workspace
Portable Setup:
- Best for: Occasional crafters, flexible needs
- Price: $50-200 for portable supplies
- Best feature: Set up anywhere, store away when done
- Considerations: Requires setup each time
Craft Zone Best Practices:
Protect Surfaces:
Use craft mats or drop cloths. Protect furniture from glue, paint, and other craft materials. This prevents furniture damage.
Good Lighting:
Ensure craft zone has good lighting. Natural light or good task lighting. This prevents eye strain and improves craft quality.
Comfortable Seating:
Choose comfortable seating for craft zone. You will spend hours crafting. Comfortable seating prevents fatigue.
Cleanup Station:
Include cleanup supplies in craft zone. Paper towels. Cleaning wipes. Trash bin. This makes cleanup easy and encourages tidiness.
Craft Zone Quantity Guidelines:
| Household Size | Craft Zones Recommended | Zone Type |
|---|---|---|
| 1 Person | 1 zone | Personal craft station |
| 2 People | 1-2 zones | Shared or individual |
| 3-4 People | 2-3 zones | Family craft area |
| 5+ People | 3+ zones | Multiple craft stations |
Small Living Room Solutions: Maximum Creativity in Minimal Space
Small living rooms need craft storage most. But they have the least space to work with. These solutions maximize every inch.
Vertical Storage:
Wall-Mounted Shelves:
Install wall-mounted shelves. Utilize wasted wall space. Store supplies on shelves. This frees up floor space for other items.
Price: $50-200 for set
Hanging Organizers:
Install hanging organizers. Utilize vertical space. Store supplies in pockets. This frees up floor space for other items.
Price: $30-100 for set
Multi-Function Solutions:
Storage Ottomans:
Use storage ottomans for craft storage. Dual-purpose furniture. Perfect for tiny living rooms.
Price: $100-500
Fold-Down Craft Tables:
Install fold-down craft tables. Utilize wall space. Fold up when not in use. Maximizes function in minimal footprint.
Price: $200-800
Hidden Storage:
Furniture with Storage:
Choose furniture with built-in storage. Store craft supplies inside. Utilizes living room space efficiently.
Price: $300-1000
Under-Seating Storage:
Use under-bench or under-chair storage. Utilize otherwise wasted space. Store supplies hidden but accessible.
Price: $50-200
Small Living Room Guidelines:
| Living Room Size | Supply Capacity | Storage Priority |
|---|---|---|
| Under 150 sq ft | 50-100 items | Vertical + hidden |
| 150-300 sq ft | 100-200 items | Multi-function furniture |
| 300-500 sq ft | 200-400 items | Full zone system |
| 500+ sq ft | 400+ items | Custom solutions |
Maintain Your Craft Storage: The 20-Minute Habit That Keeps It Working
Craft supply storage is not a one-time project. It is an ongoing practice. But it does not need to be time-consuming. Twenty minutes per week keeps your system working.
The 20-Minute Post-Craft Reset:
After each craft session, spend 20 minutes on craft supply maintenance.
Tasks:
- Return supplies to designated containers
- Check for any dried or damaged supplies
- Ensure containers are sealed properly
- Quick assessment of what needs replacing
- Wipe down craft surface
This prevents supply loss and keeps system functional.
The Monthly Assessment:
Once per month, spend 30-45 minutes on deeper craft supply maintenance.
Tasks:
- Check supply expiration dates
- Assess container effectiveness
- Note any supplies needing replacement
- Update labels if needed
- Wipe down all storage areas
This catches small problems before they become big problems.
The Quarterly Deep Dive:
Four times per year, spend 60-90 minutes. Deep clean your craft supply storage. Reorganize any areas that are not working. Donate supplies you have not used. Assess what is working and what is not.
Tasks:
- Empty and clean all craft supply storage
- Check all supplies for expiration and condition
- Assess storage system effectiveness
- Donate unused supplies
- Adjust system as needed
This keeps your system evolving with your actual crafting habits.
Supply Replacement Schedule:
| Supply Type | Typical Lifespan | Replacement Signs |
|---|---|---|
| Glue sticks | 1-2 years (opened) | Dried out, won’t stick |
| Liquid glue | 6-12 months (opened) | Separated, won’t bond |
| Markers | 1-2 years (opened) | Dried out, faint lines |
| Paint | 1-3 years (opened) | Separated, won’t mix |
| Fabric | 5-10 years | Faded, weakened fibers |
| Adhesive tape | 1-2 years (opened) | Won’t stick, dried out |
Getting Family On Board:
If you share your home, family members need to understand the system. Otherwise, they will use supplies and not return them properly.
Show Them Where Everything Lives:
Walk through the system. Explain where each supply lives. Make it easy for them to succeed.
Set Clear Expectations:
Supplies get returned after each use. Containers get sealed properly. Simple rules, consistently enforced.
Make It Worth Their While:
When supplies are organized, crafting is faster and easier. Everyone benefits. Point this out.
The Reality Check:
Perfection is not the goal. Function is the goal. Some days you will not have time to return every supply perfectly. That is okay. The system should be forgiving enough to recover quickly.
Aim for 80% maintenance. If supplies are returned to correct locations 80% of the time, the system works. Do not stress about the other 20%.
Special Craft Storage Solutions: One Size Does Not Fit All
Different craft collections need different solutions. A one-size-fits-all approach fails. Match your solution to each collection’s specific needs.
Occasional Crafter:
Best For: Monthly crafting, small supply collection
Recommended Solution:
Simple container system, basic labeling, portable caddy. Focus on simplicity and ease of use.
Price: $100-300 for complete system
Frequent Crafter:
Best For: Weekly crafting, medium supply collection
Recommended Solution:
Dedicated craft zone, organized containers, detailed labeling. Focus on efficiency and accessibility.
Price: $300-800 for complete system
Multi-Craft Household:
Best For: Multiple craft types, large supply collection
Recommended Solution:
Craft type organization, multiple storage areas, comprehensive labeling. Focus on craft type separation.
Price: $500-1500 for complete system
Family Crafting:
Best For: Multiple crafters, shared supplies
Recommended Solution:
Individual caddies per person, shared supply storage, clear labeling. Focus on personal and shared organization.
Price: $400-1200 for complete system
Specialty Craft Storage Solutions:
| Crafter Type | Best Solution | Price Range | Maintenance Level |
|---|---|---|---|
| Occasional | Simple containers + caddy | $100-300 | Low |
| Frequent | Dedicated zone + organized | $300-800 | Medium |
| Multi-craft | Craft type separation | $500-1500 | Medium |
| Family | Individual + shared storage | $400-1200 | High |
Your Action Plan: Start This Weekend
Do not wait for the perfect craft room renovation. Start with what you have and improve over time.
This Weekend (3-4 hours):
- Complete the craft supply audit
- Sort into keep, replace, donate, toss piles
- Set up basic container storage
- Label all containers
- Create first craft caddy
Next Weekend (2-3 hours):
- Install remaining storage solutions
- Set up craft zone
- Organize all supplies by type
- Create simple inventory list
Ongoing (20 minutes per craft session):
- Post-craft reset habit
- Return supplies after each use
- Monthly supply check
- Quarterly deep dive
Budget Breakdown:
Minimalist ($100-300):
- Basic containers (15-25)
- Simple labels
- One craft caddy
- Covers 80% of needs
Moderate ($300-800):
- Quality containers (30-50)
- Label maker
- Multiple caddies
- Craft zone setup
- Covers 95% of needs
Comprehensive ($800-2000):
- Premium container system
- Complete labeling system
- Dedicated craft zone
- Multiple caddies
- Custom organization
- Covers 100% of needs
The Bottom Line: Your Craft Supplies Should Support Your Creativity, Not Sabotage It
Your craft supplies deserve better than container avalanches and dried out glue. You deserve to find what you need in 30 seconds. Your supplies deserve to stay fresh for their full lifespan. Your crafting deserves to be joyful instead of frustrating.
Start small. This weekend. Audit your supplies. Clear out the dried out and unused. Set up your storage system. Label everything. Build from there.
Two months from now, you will not remember the time you spent organizing. But you will remember every single time you found the right supply instantly. Every craft session that started with a functional system. Every moment you felt creative instead of frustrated.
That is worth a weekend of work.
Related Resources
- Complete Living Room Organization Guide
- Craft Supply Care and Maintenance Guide
- Small Living Room Storage Solutions
- DIY Craft Project Organization Tips
- Home Craft Room Setup Ideas