Meta Description: Tired of digging through tool chaos? Discover practical garage tool storage solutions that save time, protect your investment, and make every project easier. Real-world tips that work.
Reading Time: 12 minutes | Difficulty: Beginner to Intermediate | Last Updated: April 2026
That Moment When You Need One Tool But Can’t Find It
You know the feeling. It is Saturday morning. You have finally got time to fix that leaky faucet or hang the shelf that has been leaning against the wall for three weeks. You grab your toolbox, dump everything onto the workbench, and start digging.
Where is that 10mm socket? You swear you just used it last month. The adjustable wrench is buried under three screwdrivers you do not even own. That Phillips head you need? Gone. Vanished. Probably rolled under the workbench never to be seen again.
Forty-five minutes later, you have found most of what you need, but you are frustrated, behind schedule, and already annoyed at a project you have not even started.
This is not just annoying. This is expensive. The average homeowner wastes 50-100 hours per year searching for tools. That is entire weekends lost to digging through disorganized garages. And it does not have to be this way.
Good tool storage is not about having the most expensive system or the prettiest garage. It is about knowing exactly where every tool lives so you can grab it and get to work. It is about protecting your investment so tools last for decades, not years. It is about making your garage a place you want to work, not a place you dread opening.
This guide shows you how to make that happen. No fancy systems required. No thousand-dollar investments necessary. Just practical, proven solutions that work for real garages with real budgets.
Why Your Current Tool Storage Is Failing You
Let us be honest. Most of us store tools however they fit. The drill goes wherever there is space. Screwdrivers end up in whatever drawer is open. That socket set lives in the box it came in because taking it out seems like too much effort.
This approach costs you more than you realize.
The Hidden Costs of Tool Chaos:
You buy duplicates because you cannot find what you already own. That is $200-500 per year wasted on tools you do not need.
You damage tools by storing them improperly. Blades dull faster. Metal rusts. Plastic cracks. That is another $300-800 in premature replacements.
You abandon projects because finding tools is more work than the project itself. How many half-finished jobs are sitting in your garage right now?
You frustrate family members who cannot find tools either. They borrow your tools, lose them, and now you are shopping for replacements again.
The Real Goal:
Your tool storage should accomplish three things. First, every tool has a designated home. Second, you can find any tool in 30 seconds or less. Third, tools stay protected and ready to work when you need them.
That is it. Nothing fancy. Just functional, sustainable organization that makes your life easier.
Start Here: The Tool Truth Audit
Before you buy a single organizer or hang one pegboard hook, you need to know what you are working with. Most people have no idea how many tools they actually own.
The Weekend Tool Audit:
Set aside two hours on a weekend. Clear a large workspace in your garage or driveway. Bring every single tool out of every corner, drawer, box, and hiding spot. Yes, even that bucket under the workbench. Yes, even the tools in your car trunk.
Lay everything out where you can see it all. This moment of truth is eye-opening.
Sort Into Four Piles:
Keep: Tools you use regularly and are in good condition. This is your working collection.
Repair: Tools worth fixing. A dull blade, a loose handle, minor rust. If repair cost is less than half the replacement cost, fix it.
Donate: Good condition but you never use them. Be honest. If you have not touched it in two years, you probably never will.
Toss: Broken beyond repair, rusted through, or dangerous. Safety first.
What You Will Discover:
Most people find they own 2-3 of common tools. Multiple hammer heads. Four tape measures. Six screwdrivers of the same size. This is normal. This is also fixable.
Keep the best quality version of duplicates. Donate or toss the rest. This alone frees up 30-40% of your storage space.
Know Your Tool Personality:
Are you a weekend warrior who does occasional projects? You need accessible, protected storage for moderate tool count.
Are you a serious DIY enthusiast with weekly projects? You need comprehensive systems with room to grow.
Are you a professional working from home? You need commercial-grade organization with maximum efficiency.
Your storage should match your actual use, not your aspirational use. Be honest about which category you are in.
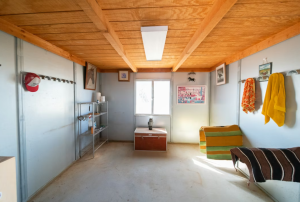
Wall Storage: Your Garage’s Best Friend
Floor space is precious. Every square foot taken by tool cabinets is square feet not available for projects, bikes, or parking. The solution is simple. Go vertical.
Pegboard: The Classic for a Reason
Pegboard has been around for decades because it works. It is affordable, flexible, and keeps tools visible.
What You Need:
- 4×8 foot pegboard sheets ($20-40 each)
- Pegboard hooks (assorted sizes, $30-60)
- Pegboard mounting hardware ($15-30)
- Optional: Paint to match garage ($20-40)
Total Cost: $100-200 for a solid starter wall
Installation Reality Check:
Mount pegboard 18-24 inches above your workbench. This keeps tools accessible while leaving work surface below. Do not mount it too high or you will not use it.
Space the pegboard 1 inch away from the wall using furring strips. This allows hooks to insert properly. Skip this step and you will fight with every hook installation.
Plan your layout before drilling. Lay tools on the floor in your desired arrangement. Take a photo. Use it as your installation map.
What Works on Pegboard:
- Hand tools (hammers, wrenches, pliers)
- Frequently used power tools
- Measuring tools
- Clamps and vises
- Gardening hand tools
What Does Not Work:
- Heavy items over 20 pounds
- Very long items (use horizontal storage)
- Items you rarely use (store elsewhere)
Pro Tip: Outline each tool with a permanent marker or paint. This creates a visual shadow board. You instantly see what is missing and where everything returns. Takes 30 minutes initially, saves hours over time.
Slatwall: The Upgrade Option
Slatwall is pegboard’s stronger cousin. It holds more weight, looks more polished, and has better accessory options. But it costs 3-4 times more.
When Slatwall Makes Sense:
- You have heavy tools (over 20 pounds each)
- You want a more polished garage appearance
- Budget allows $500-1500 for wall systems
- You plan to stay in your home long-term
When to Skip Slatwall:
- Budget is tight
- You rent your home
- Your tool collection changes frequently
- Pegboard meets your needs
Magnetic Strips: The Unsung Hero
For metal tools, magnetic strips are brilliant. They are cheap, easy to install, and keep frequently used tools within arm’s reach.
Best Uses:
- Screwdrivers (line them up like a rainbow)
- Wrenches (arrange by size)
- Scissors and snips
- Small metal tools that get lost easily
Cost: $15-40 per strip
Installation: 10 minutes with screws or heavy-duty adhesive
Real Talk: Start with pegboard. It is affordable and flexible. Upgrade to slatwall later if you need it. Do not over-invest before you know what works for your workflow.
Tool Chests and Cabinets: Protection Meets Organization
Not every tool belongs on the wall. Small items, precision tools, and expensive equipment need protected storage. This is where tool chests and cabinets earn their place.
The Three-Tier Approach:
Tier 1: Daily Use Tools
Store on pegboard or wall storage. These are tools you grab multiple times per project. Hammers, screwdrivers, tape measure, utility knife. If you use it daily, it lives on the wall.
Tier 2: Regular Use Tools
Store in top drawers of tool chest. These are tools you use weekly. Socket sets, adjustable wrenches, power drill bits, levels. Protected but still accessible.
Tier 3: Occasional Use Tools
Store in lower drawers or cabinets. These are tools you use monthly or seasonally. Specialty sockets, large wrenches, expensive power tools, precision instruments. Maximum protection, less accessibility.
Choosing the Right Tool Chest:
Small Chest (3-5 drawers):
- Best for: Apartment dwellers, basic tool collections
- Capacity: 50-100 tools
- Price: $150-400
- Reality check: You will outgrow this quickly if you do regular projects
Medium Chest (5-7 drawers):
- Best for: Weekend warriors, moderate collections
- Capacity: 100-250 tools
- Price: $400-1000
- Reality check: Sweet spot for most homeowners
Large Cabinet (10+ drawers):
- Best for: Serious DIY, professional use
- Capacity: 250-500+ tools
- Price: $1000-4000
- Reality check: Only buy if you actually have this many tools
Drawer Organization That Actually Works:
Do not just toss tools in drawers. Use drawer liners to prevent sliding and protect tools. Cut foam inserts for expensive or precision tools. This protects edges and shows immediately if something is missing.
Group tools by function in drawers. All sockets together. All wrenches together. All screwdrivers together. Do not mix categories or you will dig every time.
Keep frequently used items in top drawers. Less used items in lower drawers. Your back will thank you.
Budget Reality:
You can build a functional tool storage system for $300-600. Pegboard ($150), small tool chest ($250), hooks and accessories ($100). This covers 90% of homeowner needs.
Do not feel pressured to buy the $3000 cabinet system unless you actually need it. Start modest. Expand as your collection grows.
Create Work Zones That Match How You Actually Work
Tools are not just random objects. They are grouped by what you do with them. Organize your storage to match your actual projects.
The Zone Approach:
Woodworking Zone:
- Saw storage (wall-mounted or rack)
- Clamps and vises (within arm’s reach of workbench)
- Measuring and marking tools (dedicated drawer or pegboard section)
- Sanding supplies (near dust collection if you have it)
- Wood fasteners and hardware (small parts organizer)
Automotive Zone:
- Socket sets (protected drawer)
- Jack and stands (floor storage, clearly marked)
- Fluids and chemicals (sealed cabinet, away from heat)
- Automotive power tools (dedicated shelf or cabinet)
- Rags and cleaning supplies (separate from clean tools)
Electrical Zone:
- Wire strippers and cutters (dedicated drawer)
- Voltage tester and multimeter (protected case)
- Electrical tape and connectors (small parts organizer)
- Wire spools (vertical rack or shelf)
- Safety equipment (gloves, glasses, nearby)
Gardening Zone:
- Hand tools (pegboard or hanging rack)
- Power tools (protected cabinet)
- Gloves and knee pads (hooks near tools)
- Small supplies (twine, stakes, ties in bin)
- Chemicals (locked cabinet, separate from tools)
Why Zones Matter:
When you start a project, everything you need is in one area. No running across the garage. No digging through unrelated tools. You grab what you need and work.
This saves 5-10 minutes per tool retrieval. Multiply that by several tools per project. That is an hour saved on a typical Saturday project.
Setting Up Zones:
Start with your most common project type. If you do mostly woodworking, optimize that zone first. If you work on cars, start with automotive. Build out other zones over time.
Keep zones near where you use the tools. Woodworking near the workbench. Automotive near the garage door. Gardening near the side door to the yard.
Use visual cues to mark zones. Different colored pegboard sections. Labels on drawers. Tape on the floor to mark zone boundaries. Make it obvious where everything lives.
Small Parts Organization: Stop Losing the Little Stuff
Small parts are the enemy of garage organization. Screws, nuts, bolts, washers, anchors. They multiply like rabbits and disappear like magic.
The Small Parts Reality:
You do not need 47 different types of screws. You need the 5-10 types you actually use, organized so you can find them.
Small Parts Storage Options:
Clear Plastic Bins with Dividers:
- Best for: Most common screws, nuts, bolts
- Price: $20-50 per bin
- Why it works: You can see contents, dividers keep types separate
- Pro tip: Label each compartment. Trust me on this.
Parts Cabinets with Small Drawers:
- Best for: Serious collections, many small parts types
- Price: $50-200
- Why it works: Many small compartments, protected from dust
- Pro tip: Mount on wall near workbench for easy access
Magnetic Parts Trays:
- Best for: Current project parts, temporary storage
- Price: $10-30
- Why it works: Parts do not roll away, magnetic holds screws
- Pro tip: Use during projects, empty when done
Clear Jars on Shelves:
- Best for: Bulk storage, less frequently used parts
- Price: $20-40 for jars
- Why it works: Inexpensive, visible contents, easy to grab
- Pro tip: Use uniform jar sizes for clean appearance
The Small Parts System That Works:
Step 1: Consolidate. Dump all your small parts onto a table. Combine partial boxes of the same screw type. Throw away rusty or damaged fasteners.
Step 2: Categorize. Group by type (screws, nuts, bolts, washers, anchors). Then by size within each type.
Step 3: Containerize. Put each category in its own compartment or container. Do not mix types or you will regret it.
Step 4: Label. Every compartment gets a label. Screw size. Bolt type. Anchor size. Future you will be grateful.
Step 5: Maintain. When you use the last of something, add it to your shopping list. Do not wait until you need it for a project.
Hardware Shopping Tip:
Buy a small parts organizer before you go to the hardware store. Sort your new purchases immediately when you get home. Do not toss them in the “hardware drawer” or they will disappear forever.
Power Tool Storage: Protect Your Investment
Power tools are expensive. A quality drill is $150-300. A good circular saw is $200-400. A table saw can run $500-2000. These deserve proper storage.
Power Tool Storage Priorities:
Protection from Dust:
Garage dust is abrasive. It gets into motors and bearings, shortening tool life. Store power tools in cabinets or covered areas when possible.
Protection from Moisture:
Humidity causes rust on metal parts. Store in climate-controlled areas if possible. Use silica gel packets in storage containers.
Battery Care:
Lithium batteries last longest when stored at 40-60% charge. Do not store fully charged or fully depleted. Remove batteries from tools for long-term storage.
Cord Management:
Wrap cords loosely, not tightly. Tight wrapping damages internal wires over time. Use velcro ties, not twist ties. Hang coiled cords on hooks.
Power Tool Storage Solutions:
Original Cases:
Keep the cases your tools came in. They are designed for your specific tool. Stack them on shelves or store in cabinets. This is free protection you already own.
Dedicated Power Tool Shelves:
Install shelves at comfortable height (chest to eye level). Store tools with cases on shelves. Keep frequently used tools most accessible. Label each space.
Rolling Tool Cart:
For tools you move between locations. Load cart with current project tools. Roll to work area. Roll back when done. Keeps tools together and mobile.
Wall-Mounted Power Tool Holders:
Custom holders for specific tools. Drill holder. Saw holder. Sander holder. Keeps tools visible and accessible. Frees up shelf space.
Power Tool Maintenance Schedule:
After Each Use:
- Wipe down exterior
- Check cord for damage
- Return to designated storage
- 2 minutes total
Monthly:
- Check all cords for damage
- Test safety features
- Clean air vents
- 15 minutes total
Seasonally:
- Deep clean all tools
- Check brushes and bearings
- Lubricate moving parts
- 30-60 minutes total
Labeling: The Secret Weapon Most People Skip
Here is the truth. Most tool organization systems fail not because they are bad systems, but because people do not maintain them. Tools get used and not returned. Family members borrow tools and put them somewhere else. Slowly, chaos returns.
Labeling fixes this.
Why Labeling Works:
Labels remove decision fatigue. You do not think about where the hammer goes. The label tells you. Family members do not guess where tools belong. The label tells them.
Labels create accountability. When a tool is missing, you know immediately. The empty labeled spot is obvious. This encourages people to return tools.
Labels make maintenance automatic. You can tidy your garage in 5 minutes because every tool has an obvious home.
Labeling Methods That Work:
Shadow Boards:
Outline each tool on pegboard with paint or marker. Visual and immediate. You see instantly what is missing. Takes 30 minutes to create, saves hours over time.
Label Makers:
Use for drawers, bins, shelves. Clear, professional appearance. Weather-resistant labels last for years. Worth the $30-50 investment.
Masking Tape and Marker:
Budget option that works. Write tool names on tape. Stick on drawers and bins. Replace when worn. Costs $5, lasts 6-12 months.
Color Coding:
Assign colors to tool categories. Red for electrical. Blue for plumbing. Green for gardening. Yellow for automotive. Visual identification is instant.
What to Label:
Every drawer. Every bin. Every shelf section. Every pegboard zone. Every cabinet. If it holds tools, it gets a label.
Be specific. Not “screws.” Instead “Wood Screws 1-2 inches.” Not “wrenches.” Instead “Combination Wrenches 8mm-19mm.” Specificity prevents confusion.
Labeling Pro Tips:
Label at eye level. Do not make people bend down to read labels.
Use consistent labeling style throughout. Same label maker. Same font. Same color scheme. Consistency creates a system that feels intentional.
Laminate labels or use weather-resistant materials. Garage conditions are tough. Regular paper labels will not last.
Take photos of your labeled system. Keep on your phone. Reference when reorganizing or expanding. Helps maintain consistency over time.
Maintenance: The 5-Minute Habit That Saves Hours
Organization is not a one-time project. It is an ongoing practice. But it does not need to be time-consuming. Five minutes per week keeps your system working.
The 5-Minute Weekly Reset:
At the end of each week, spend 5 minutes in your garage. Return tools to labeled locations. Straighten any tipped items. Quick visual check that everything is where it belongs.
That is it. Five minutes. This prevents the slow creep of chaos that happens when tools are not returned.
The 30-Minute Monthly Check:
Once per month, spend 30 minutes. Wipe down surfaces. Check tool condition. Note any tools that need repair or replacement. Restock any depleted supplies.
This catches small problems before they become big problems. A loose handle tightened now prevents a broken tool later.
The Seasonal Deep Dive:
Four times per year, spend 2-3 hours. Deep clean your tool storage. Reorganize any zones that are not working. Donate tools you have not used in six months. Assess what is working and what is not.
This keeps your system evolving with your needs. Your tool collection changes over time. Your storage should too.
Getting Family On Board:
Show family members where tools live. Walk through the system. Explain the labels. Make it easy for them to succeed.
Set clear expectations. Tools get returned after use. If you borrow a tool, you return it. Simple rules, consistently enforced.
Make it worth their while. When the garage is organized, projects go faster. Everyone benefits. Point this out.
The Reality Check:
Perfection is not the goal. Function is the goal. Some days you will not have time to return every tool perfectly. That is okay. The system should be forgiving enough to recover quickly.
Aim for 80% maintenance. If tools are returned to correct locations 80% of the time, the system works. Do not stress about the other 20%.
Your Action Plan: Start This Weekend
Do not wait for the perfect system. Start with what you have and improve over time.
This Weekend (4-6 hours):
- Complete the tool audit
- Sort into keep, repair, donate, toss piles
- Install basic pegboard section (one 4×8 sheet)
- Set up one tool chest or cabinet
- Label your first zone
Next Weekend (3-4 hours):
- Organize small parts
- Set up power tool storage
- Label remaining zones
- Create shadow board for most-used tools
Ongoing (5 minutes weekly):
- Weekly reset habit
- Return tools after each use
- Monthly 30-minute check
- Seasonal deep dive
Budget Breakdown:
Minimalist ($200-400):
- One pegboard sheet and hooks
- Basic tool chest
- Labels and small parts bins
- Covers 80% of needs
Moderate ($500-1000):
- Multiple pegboard sections
- Quality tool chest
- Small parts cabinet
- Power tool shelves
- Comprehensive labeling
- Covers 95% of needs
Comprehensive ($1500-4000):
- Full wall systems
- Multiple tool chests
- Dedicated zones
- Professional organization
- Covers 100% of needs
The Bottom Line:
Your tools deserve better than random drawers and boxes. You deserve to find what you need in 30 seconds. Your projects deserve to start without a 45-minute tool hunt.
Start small. This weekend. Audit your tools. Install one pegboard. Label one zone. Build from there.
Six months from now, you will not remember the time you spent organizing. But you will remember every single time you grabbed the right tool instantly. Every project that started on time. Every Saturday morning that was productive instead of frustrating.
That is worth a weekend of work.
Related Resources
- Complete Garage Organization Guide
- Pegboard Installation Tips and Tricks
- Tool Maintenance and Care Guide
- Small Parts Organization Ideas
- Garage Workbench Setup Guide